Quick Start
This page will get you up and running with RDDR in no time. We will deploy 3 instances of DVWA running at different security levels behind RDDR sharing a single database microservice.

DVWA deployment with RDDR block diagram
1. Install Kubernetes on your system. and enable the DNS service. Istio is not supported at this time; we’ve seen issues with Istio sidecars. Best to disable sidecars for now.
Clone the RDDR project repository:
git clone https://rjw245@bitbucket.org/rjw245/rddr.git
Move to the folder rddr/deployments/dvwa_frontend/k8s
cd rddr/deployments/dvwa_frontend/k8s
4. Apply all kubernetes yaml files in this directory. The command for microk8s is shown below:
microk8s.kubectl apply -f .
Wait until all pods are in the Running state. MySQL can take some time even after it’s in the Running state to become fully ready.
Open localhost:31001 in your browser. You should see the login page:

DVWA login page
Login with user
admin, passwordpassword.Click “Create/Reset Database” and login once more.
8. Navigate to the “SQL Injection” tab.
/home/riley/rddr/docs/.venv/bin/pygmentize
9. Enter a benign input in the User ID box, such as 1.
Press enter and you’ll see the request goes through.
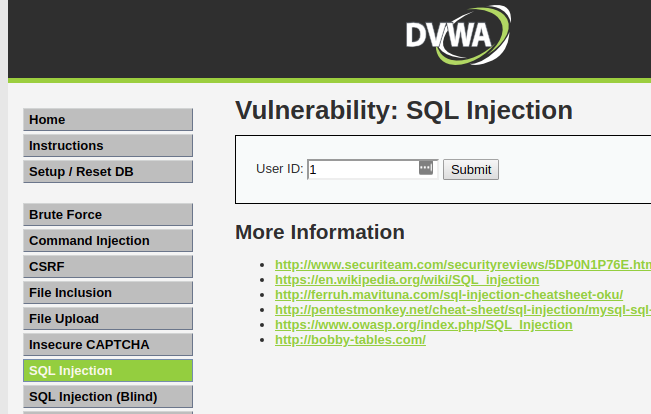
DVWA SQL Injection with benign input
Enter a malicious input such as:
' UNION SELECT user,password from users WHERE '1'='1
and press enter.
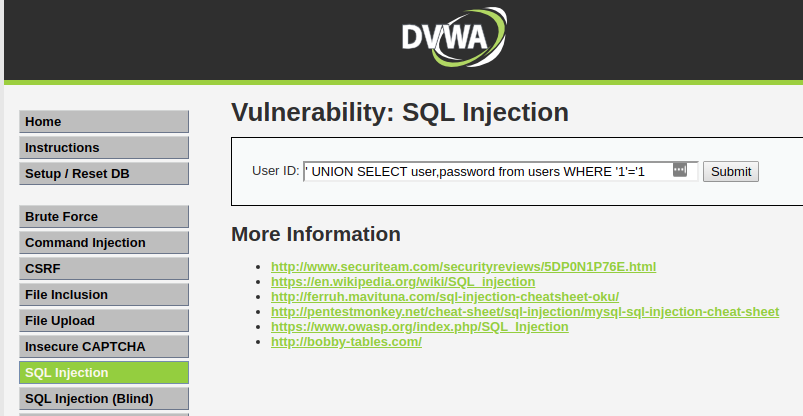
DVWA SQL Injection with malicious input
You should see the request gets denied by RDDR:

RDDR Denying Access
This is because we’ve deployed multiple instances of DVWA configured for different security levels. The more secure instance properly sanitizes the SQL query which causes its query to the database to look different from that of the other instances. RDDR catches this divergence in behavior and blocks the response to the user so that the SQL sanitization bug cannot be exploited.